Wednesday, September 25, 2013

Salvador Dali's Mustache

I Mustache You A Question...

Do you know Salvador Dali?  And more importantly, do you know about his 'stache?

Fourth graders started off the art year learning about the craziness that is Surrealism and the ever so eccentric, Salvador Dali.  We learned about him and some of his quirky behaviors (did you know he was terrified of grasshoppers?), the qualities of Surrealism and about his infamous mustache!  I introduced all of this to them with a PowerPoint (if you want a copy of it for your classroom, just ask, I can send it your way).

This lesson focuses on Art History with Salvador Dali and Surrealism but I also take it as an opportunity to teach about portraiture and facial proportions.  Since we focus on the silliness of Surrealism and the silliness of Salvador's mustache, I give the kids the option to wear fake mustaches while they work...this really adds a lot of fun to the lesson and a hilariously awesome work environment.


4th Grade Salvador Dali Mustache Portraits with Surrealism

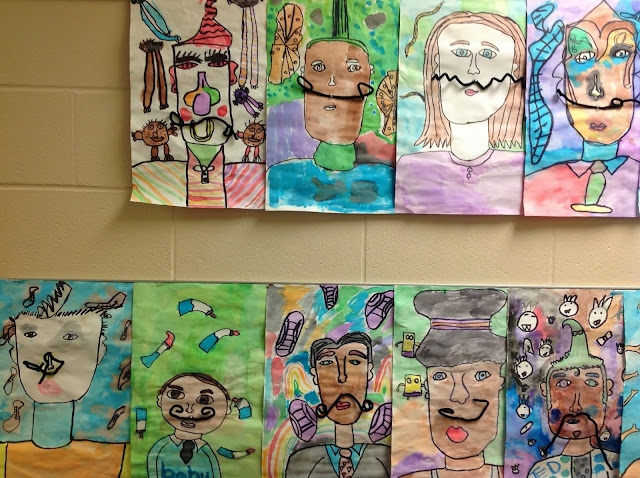
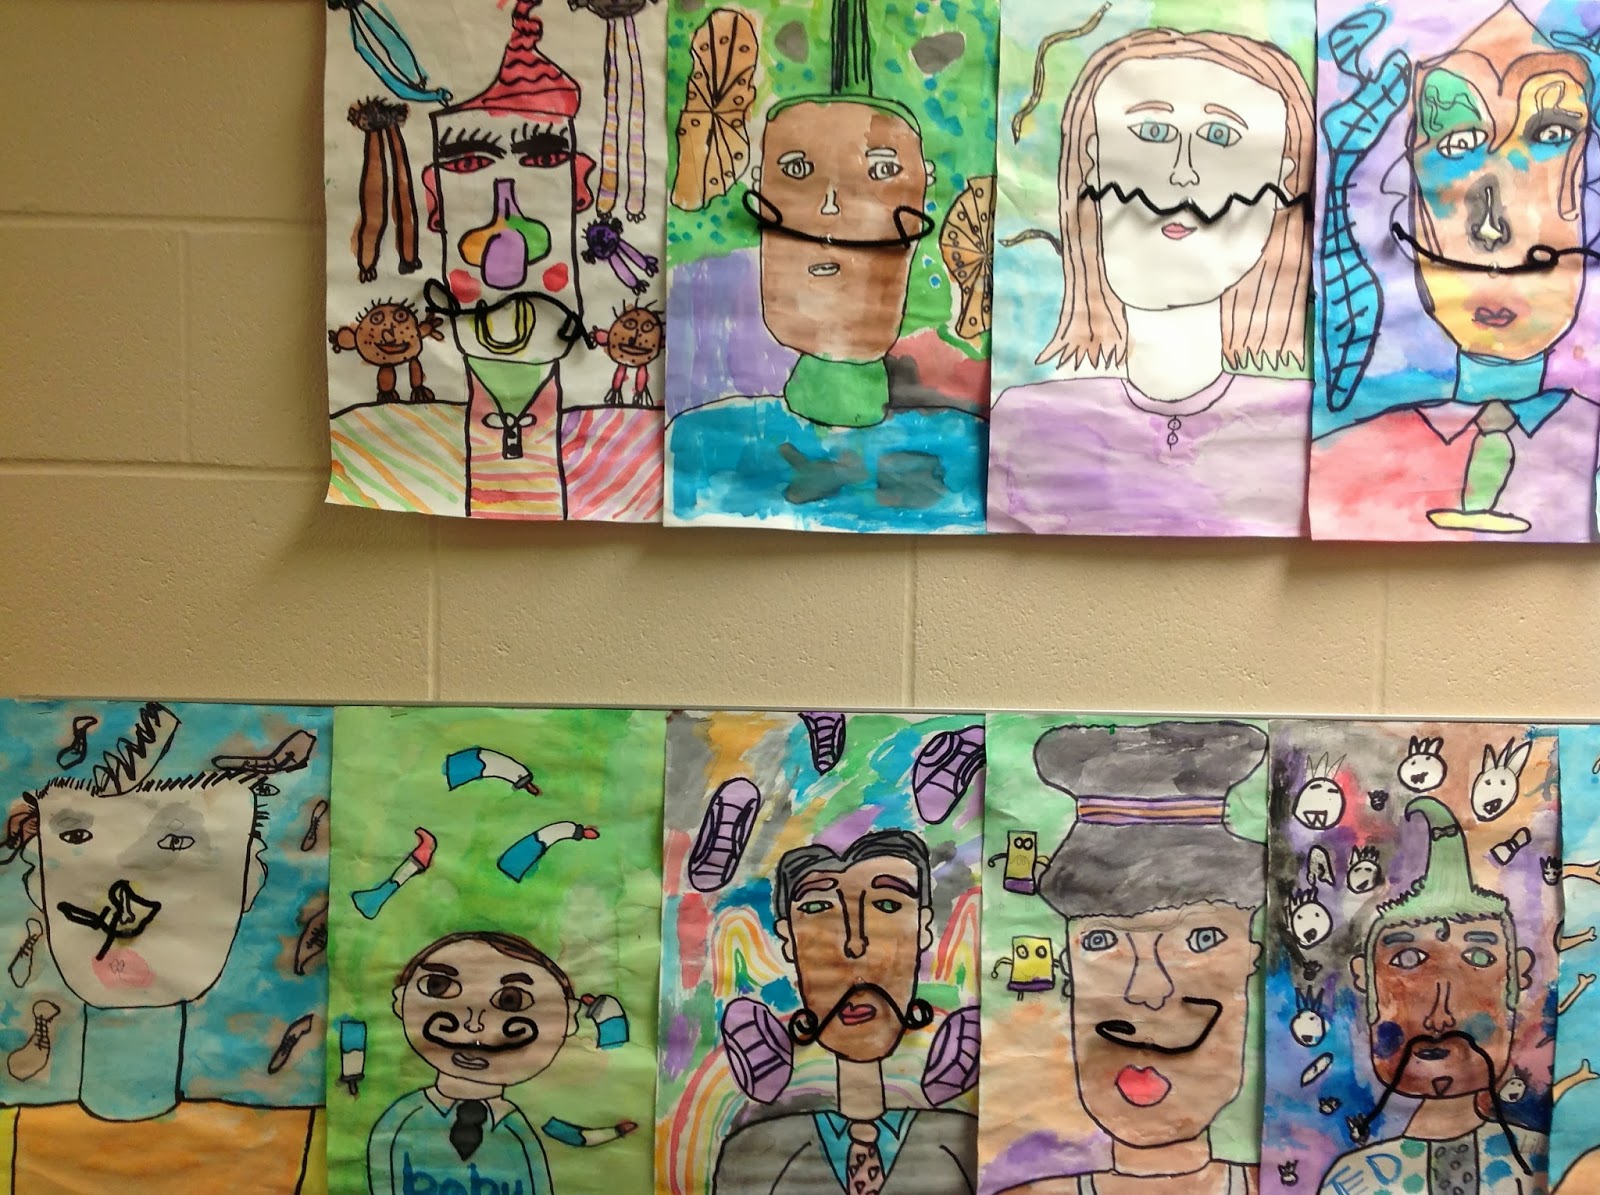
We discuss facial structure as a class and I have the students draw a nice and large portrait (it can be of Salvador Dali, themselves, or someone else--even a made up person).  We then discuss background and foreground overlapping and add a surreal background that is inspired by Dali.  The students used watercolor to paint their portrait and background and then came the fun part...the mustache!  When the students are done painting, they are given a pipe cleaner to bend into any strange mustache shape they would like.  And when their painting is dry,  I personally hot glue it onto their portrait for them.  Some kids still like to readjust their mustache after the hot glue dries, but for the most part, the kids are pleased with their creation!  This is, by far, one of my favorite lessons!  I just love the atmosphere of the kids wearing fake glasses and mustaches and then, when the artwork is finished and hung, having 75 silly mustachioed portraits greet me as I walk down the halls (pictured below)!

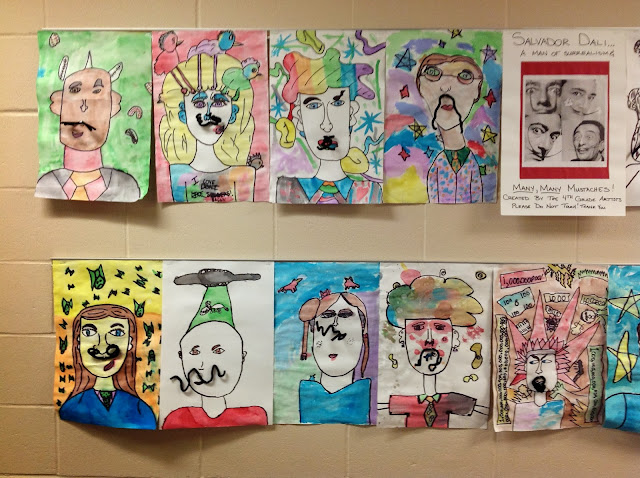
4th Grade Salvador Dali Mustache Portraits with Surrealism

When/if students finish early, I like to offer a supplemental activity that is in theme or reiterates what we were learning.  So for the Surrealism aspect of this lesson, I asked students who finished early to make up their own animal and they had a blast with it!  There are some really creative minds out there and they didn't even just stop with their drawing, a lot of them came up with names for their animals (ever see a turtlope?)

We made a small list of what we remembered about Surrealism in our second class period together.  Then I showed them how to use their finished early time by inventing their own animal!

Invent Your Own Animal Finished Early Activity

Invent Your Own Animal Finished Early Activity
Take note that this student wrote "Made in 1982" at the bottom...must be a vintage animal
More 'staches from other years:

Friday, September 20, 2013

Optical Illusion Cubes

5th Grade Op Art

5th Grade Optical Illusion Cube with Parallel Lines and Crayon Shading

I love introducing my students to Optical Illusions!  They get really excited about it and so do I!  There are always some frustrating moments in the process for the kids, but they love the results and are amazed at what they are capable of in the end!  (Can you tell I get excited about this?  I just wrote three sentences in a row that ended in exclamation points and I'm pretty sure I could finish this post without the help of any other punctuation)

Not only do I love teaching Op Art, but I like to change up what lessons I go with for this unit.  This year, I found an amazing idea from another teacher and blogger http://artisandesarts.blogspot.com/ and owe her a giant 'thank you' for the lesson, because it was different than what I had done before and it was great at getting the kids' motor skills and worked with math skills and vocabulary! I may have put my own spin on the lesson, but she was the idea-man woman.

We started by looking at various Optical Illusions that I had compiled into a PowerPoint.  It really gets the kids excited and it's so much fun to hear all of the "oohs" and "ahhs" among the "I can see it!  It's moving!" or "It's blinking at me!"  If you'd like a copy of my PowerPoint, give me your email and I can send it your way.  While we look at all of the amazing Op Art, I remind the students that nothing in the images is actually moving or blinking, that it is all just a careful combination of lines, pattern and color choice.

I showed them a finished example of what our Optical Illusion would look like and the kids couldn't believe they were going to make be able to make this.  But I assured them that they would do great, it just takes patience and understanding where to put certain lines and colors.  And I reminded them that I would help walk them through it and that I just wanted them to do the best that they could and that nothing is ever perfect.

I wanted to start them off with some simple ruler (as a straight edge) practice so that none of them would be criss-crossing their arms and struggling to make straight lines as well as reiterate some math vocab and recap on what a "parallel line" is.  I demonstrated the proper use of a ruler and asked them to draw some parallel lines on a  paper I provided them.  The sheet I gave them had three lines printed in various directions and I just asked that they use their ruler to draw at least one parallel line next to each of the three. This was just so I knew they really understood parallel lines (because with this lesson, I was going to refer to them a lot) and how to use a ruler as a straight edge.
Ruler and Parallel Line Practice Sheet


After our practice, we dove right into our own Op Art.  We broke down the finished version into simple shapes; one student proudly proclaimed "It's just a hexagon inside of a hexagon!" Of course he was correct and I was going to help them make those hexagons.  We started with a pre-made printed template I got from Artisan des Arts (blogger previously mentioned) and we got down to business! I don't normally use previously made templates like this, but I knew that the kids were going to be working hard with their rulers, parallel lines and angles, so this time, I made an exception.
Pre-made Template for Optical Illusion Cube

We started by making our small cube inside of the large hexagon using (what else) parallel lines!  I
walked the students through the steps and tried to remind them that they would not be perfect since were were "eyeballing" our parallel lines and kept pointing out that my example was also not perfect and the illusion still worked.  This was a concern the students continually had and I think that seeing me point out my flaws, helped put them at ease when they were struggling.

I took photos of the step by step process below.  I started by taking them individually but after a few, I started to combine the steps side by side for efficiency.  If you want any more details of the instruction that went along with them, let me know, I'd be happy to provide an instruction guide with the images.


Because this is a challenging lesson for 5th graders, I had them color their small cubes in to give them a break from dividing their sections up into thirds and drawing all of the parallel lines.  We colored the "top" section in the darkest with our crayons, medium shading on the right and lightest on the left.  We discussed how to get shades out of our crayon and I let the students decide if they wanted to color using a pattern (many of them chose checkerboard style) or just color at random like in my example.  I reminded them that for the optical illusion to work, it was just all about shading and it helped for them to use the same colors throughout the entire piece of artwork


Ta-da!!
Finishing the Coloring/Shading on our Op Art Cube

When they were finished coloring, I allowed the students to cut out their illusion and glue it to a sheet of construction paper...their color choice of course!  The results were amazing, they all had a sense of pride in their work and were amazed at what they came up with!  Through any frustrations they had with the rulers and making parallel lines, they were finally able to look past their imperfections and see the amazing piece of Op Art that they created.  Plus I was able to get my love for cross curricular lesson planning with the incorporated math (dividing lines into thirds, making parallel lines, color shading, optical illusions, what more could you ask for in a lesson?!).  


5th Grade Optical Illusion Cube with Parallel Lines and Crayon Shading

5th Grade Optical Illusion Cube with Parallel Lines and Crayon Shading

Being mindful of my shared bulletin strips and wall space in the halls, I created three different wall displays of the students' artwork. Two were displayed in the fifth grade hallway and one is located in the main hallway near the cafeteria...a chance for everyone to see what the fifth graders are up to!
5th Grade Optical Illusion Cube with Parallel Lines and Crayon Shading

5th Grade Optical Illusion Cube with Parallel Lines and Crayon Shading


Friday, September 13, 2013

Accidental Art Twins

Mrs. Grabau (K-3 Art Teacher on the left) and I (4-8 Art Teacher on the right) proved that great minds think alike...and have great fashion sense.  We didn't even realize how similarly we had dressed until a student pointed it out!  Accidental twins or telepathic connection?  You decide

Thursday, September 12, 2013

Coat of Arms

Coat of Arms

Middle School Coat of Arms Art

My 7th graders are currently learning about the Middle Ages, and one of my favorite things to do is work with my fellow teachers and collaborate on lesson plans.  Which, in this case, lead to a Coat of Arms art project.
Middle School Coat of Arms Artwork


Before introducing the kids to the lesson at all, I had them start class by making a list of their interests, their family's traditions, family values and their heritage.  Once they made their lists, I started my lesson with an introductory PowerPoint about the history, significance and various parts of a Coat of Arms.  We had already talked about symbolism in our first day hand activity, so when I asked them to refer back to their lists, they knew exactly where we were heading.  I still couldn't help myself, and we did discuss symbolism a little bit further in terms of what colors can represent, how animals can be symbols and elaborated on what we already knew.

The students set to work at designing a unique Coat of Arms for their family.  While many of them were eager to share their actual family Coat of Arms, I just encouraged them incorporate parts of those into their artwork instead of trying to replicate it.  Once we had sketched out our ideas, we discussed our options for making our final version.


I gave my students three choices.  They could either draw their Coat of Arms, paint it (on canvas, decorative paper or regular paper) or turn it into a metal relief.  Most of the students chose to draw their Coat of Arms but it was fun to see which students gravitated towards which materials, especially since I am still getting to know this group of kids.  I gave the students the various requirements for each medium and demonstrated the proper techniques.  I think the metal relief was the trickiest because they struggled with getting the hang of raising certain areas as opposed to just tracing their pencil lines over it and leaving it as is.  So we really had to talk about using texture and a combination of thin/thick lines to make our images really stand out on the metal.  Regardless of which medium they chose, I loved the different ideas they all had!


The results were outstanding!  I love the variety of media and techniques mixed with the personal touches each student added.  After completing their artwork, I discussed the process of critiquing with them.  I explained to them that writing a critique is not intended to be a challenge, that it is intended for them to get used to talking (or writing) about their artwork and the process(es) that they went through.  I explained that I wanted them to consider all of the work they put into their art and evaluate the results.  There will be other times that we have verbal critiques, but I want them to become comfortable discussing their own work before discussing each others' work.
Middle School Coat of Arms ArtworkMiddle School Coat of Arms Artwork

Middle School Coat of Arms ArtworkMiddle School Coat of Arms Artwork


Middle School Coat of Arms Artwork


Thursday, August 29, 2013

Allow Me to Introduce Myself...


It's a new school year and there are a lot of new faces and a lot of new names to learn!  This year I am staring off art class with a "hands on" (pun intended...you'll get it later) assignment that's all about me...or you...or them, depending on who's reading this.  

I did the usual introduction of myself but this year as Mrs. Heath instead of Ms. Dale!  Of course I had to go over school rules and expectations on the first day, but I also wanted to start right in with some art making.  In doing so, I offered my students the chance to introduce themselves with a little discussion and lots of symbolism.  The students started by tracing their hand onto a sheet of construction paper, they got to choose which color.  Then to keep it simple, we wrote our names nice and big (and decorative, if they were up to the challenge)


With the older students (which currently includes 5th and 7th graders for me...and in later trimesters will include 6th and 8th graders too) I discussed symbolism and how we can represent our interests and personalities with pictures.  With my 4th graders, we just talked about how we can draw pictures of things that show what we like.  I also introduced all of the students to my "no stick figure" rule which of course, temporarily crushed some hopes and dreams.  We brainstormed some possible symbols and then filled our traced hand with anything and everything we could think of to represent ourselves.  When they were finished, the students cut them out.


I asked the students why they think we made hands instead of just filling the paper or using another shape.  They contributed a lot of thoughts about how our hands are a part of us (some even brought up fingerprints as identification) and others talked about the work that we can do with our hands.  We discussed all of these things and talked about how hands can be used to greet (shaking hands), encourage (high-five, thumbs up) and show peace (shaking hands, two finger peace sign).  We also discussed that many hands can do great work.  So I explained to them what our end result would be, which is what you see hanging outside of the school office today.  I combined all of the paper hands to assemble a paper chandelier.  Symbolic of all of the individuals in our school that are working together to make our school a great place.   And hey, it also just looks cool!


Friday, May 17, 2013

Still Life Drawing

In my last post I talked about my students practicing their drawing skills with Tootsie Rolls.  As a follow up and more challenging experience, I asked them to create Still Life Drawings.  We looked at some examples and recapped what we learned with the Tootsie Rolls and got right down to business!

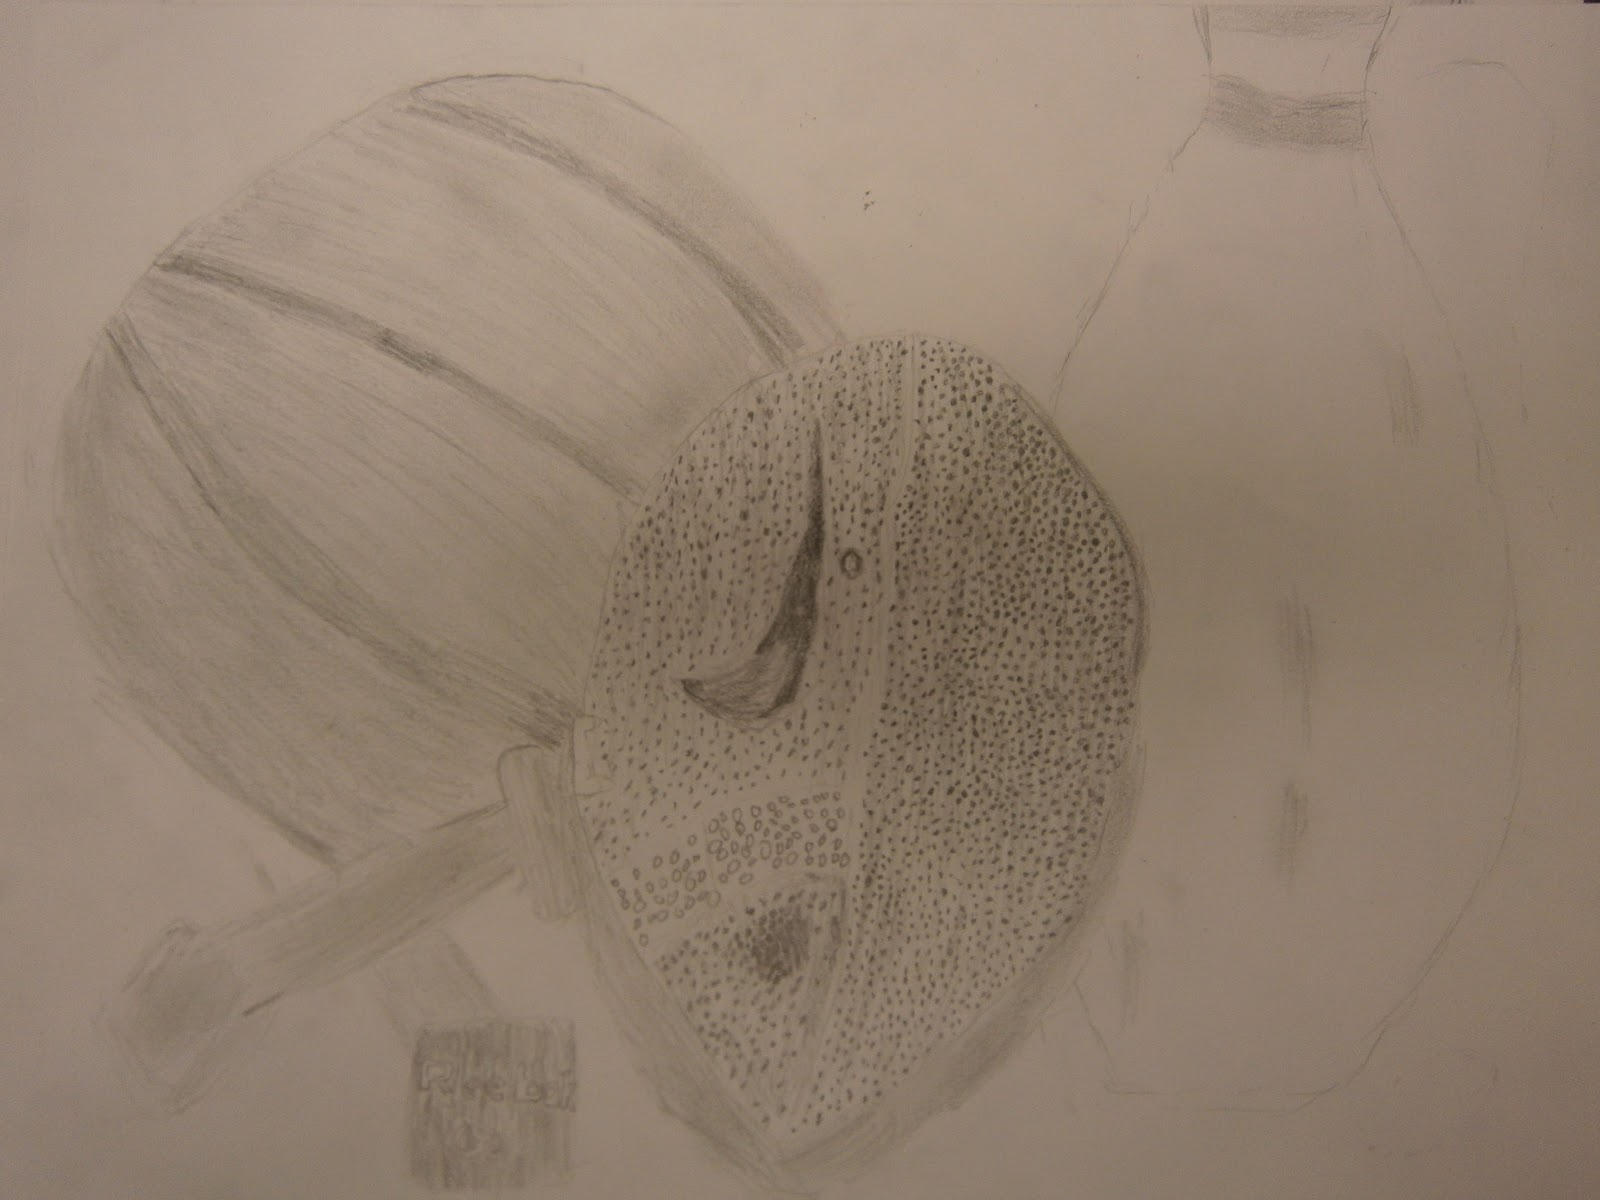
I set up five different Still Lifes with a variety of themes.  I let the kids pick which Still Life interested them the most and we began drawing.  We focused on sketching what we see, adding value and finishing with blending and erasing for highlights.  I reminded them that they all had different view points on the still life so no two drawings would look the same and depending on how large they drew each object, they might only see (and draw) part of the still life.  My only request was that they included at least 4 major elements of the still life...and that they try their best!  We spent 3 class periods on this in total and I think they came out very nicely!  The kids worked hard and I consider this to be the hardest task I gave them this year and it shows that they were up for it!

Theme Option 1: Sports

Above is a Black and White Photo of the Original Still Life with Student Drawings Below


Theme Option 2: Board Game

Above is a Black and White Photo of the Original Still Life with Student Drawings Below
 
 
Theme Option 3: Girl Accessories


Above is a Black and White Photo of the Original Still Life with Student Drawings Below


 Theme Option 4: Art Supplies

Above is a Black and White Photo of the Original Still Life with Student Drawings Below


Theme Option 5: Storybook/Fairytale

 Above is a Black and White Photo of the Original Still Life with Student Drawings Below