Friday, April 11, 2014

Positive & Negative Space Zentangles

Zen that tangle

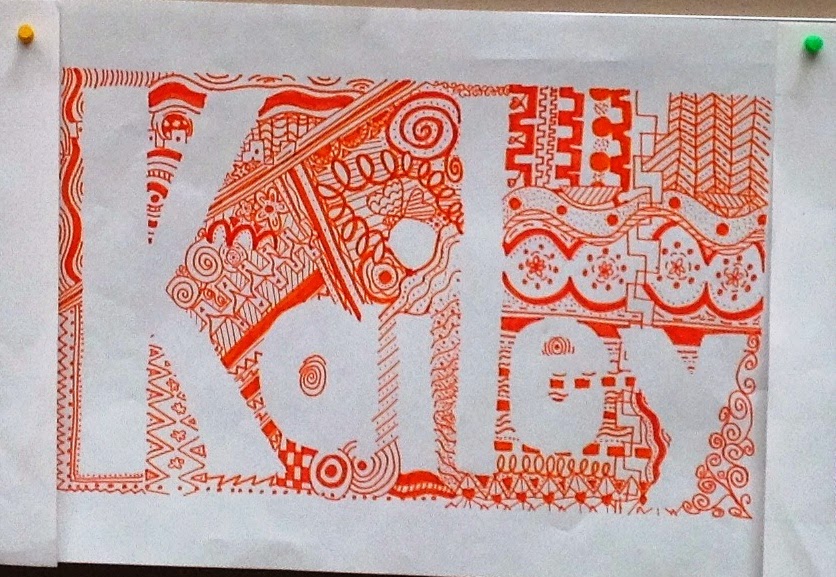
Positive Negative Space Zentangle with Unity and Variety Art Lesson

My school year is divided into trimesters and each trimester, I switch which level of middle school I teach.  I recently (okay, it's been a few weeks now but I've been slacking on the blog) began the third trimester and am teaching eighth grade.  I'm awful with names, so this project was perfect to start with so that I could work on that skill (learning their names) AND still have an art agenda!  

Without much--or any--instruction, I started by having the students draw four patterns in their sketchbook, followed by four designs.  Then I asked them to describe the difference between design and pattern.  I also had them describe "variety" and how it can be used in design making.  We looked at our sketchbooks and what we had drawn, then discussed what makes a good design/pattern and a bad design/pattern and how variety can play a role.  We talked about variety in color, thin/thickness of a line, types of lines or shapes, direction/angle and anything else we could possibly come up with that you could vary in the process of art making.  We also made a list (they were actually drawings) of different types of lines and shapes on the white board.  Once we had a handle on those things, we moved on to talk about positive and negative space and what we would be doing with these various art words/techniques.

We started by drawing a 1.5" border around their paper (this was just an excuse to remind them how to hold and use a ruler to draw a straight edge as well as how to measure a border consistently instead of eyeballing it).  I asked them to write their name in bubble or block letters inside of their frame and to make sure none of their letters were touching.  I had them use their ruler to divide their framed area into six random sections.  In each section I had them draw a different type of line (just to keep them on their toes about the variety aspect--they have to incorporate that random line into a design somehow, right?).  I reminded them of what a Zentangle is and how they should keep adding details and eventually find that they are "lost in design."  I also reminded them to maintain their letters as the negative space and to fill designs/patterns right up against and in between each letter.  

I let them decide if they wanted to use one color or multiple colors and just encouraged those who chose multiple to keep an eye on even color distribution.  At the end, I told them that they could use colored pencils to add some shading if they wanted some depth to a few areas of their zentangle, but unfortunately, many of them thought that they could just color in their background (which kind of defeated our designs forming the positive and negative space instead of an outline or coloring in of something).  The variety came out great and many of them really grasped the concept of unity too!  I love having our halls decorated with these beautiful name designs!

As I go to post these photos, I realize how blurry they are and crooked many of them are, I apologize...I need to stop using the iPad as a camera, I never take good photos with that thing!
Positive Negative Space Zentangle with Unity and Variety Art Lesson

Positive Negative Space Zentangle with Unity and Variety Art Lesson

Positive Negative Space Zentangle with Unity and Variety Art Lesson

Positive Negative Space Zentangle with Unity and Variety Art Lesson

Positive Negative Space Zentangle with Unity and Variety Art Lesson

Positive Negative Space Zentangle with Unity and Variety Art Lesson

Positive Negative Space Zentangle with Unity and Variety Art Lesson

Positive Negative Space Zentangle with Unity and Variety Art Lesson

Positive Negative Space Zentangle with Unity and Variety Art Lesson

Positive Negative Space Zentangle with Unity and Variety Art Lesson

Positive Negative Space Zentangle with Unity and Variety Art Lesson

Positive Negative Space Zentangle with Unity and Variety Art Lesson

Thursday, April 10, 2014

Chinese New Year

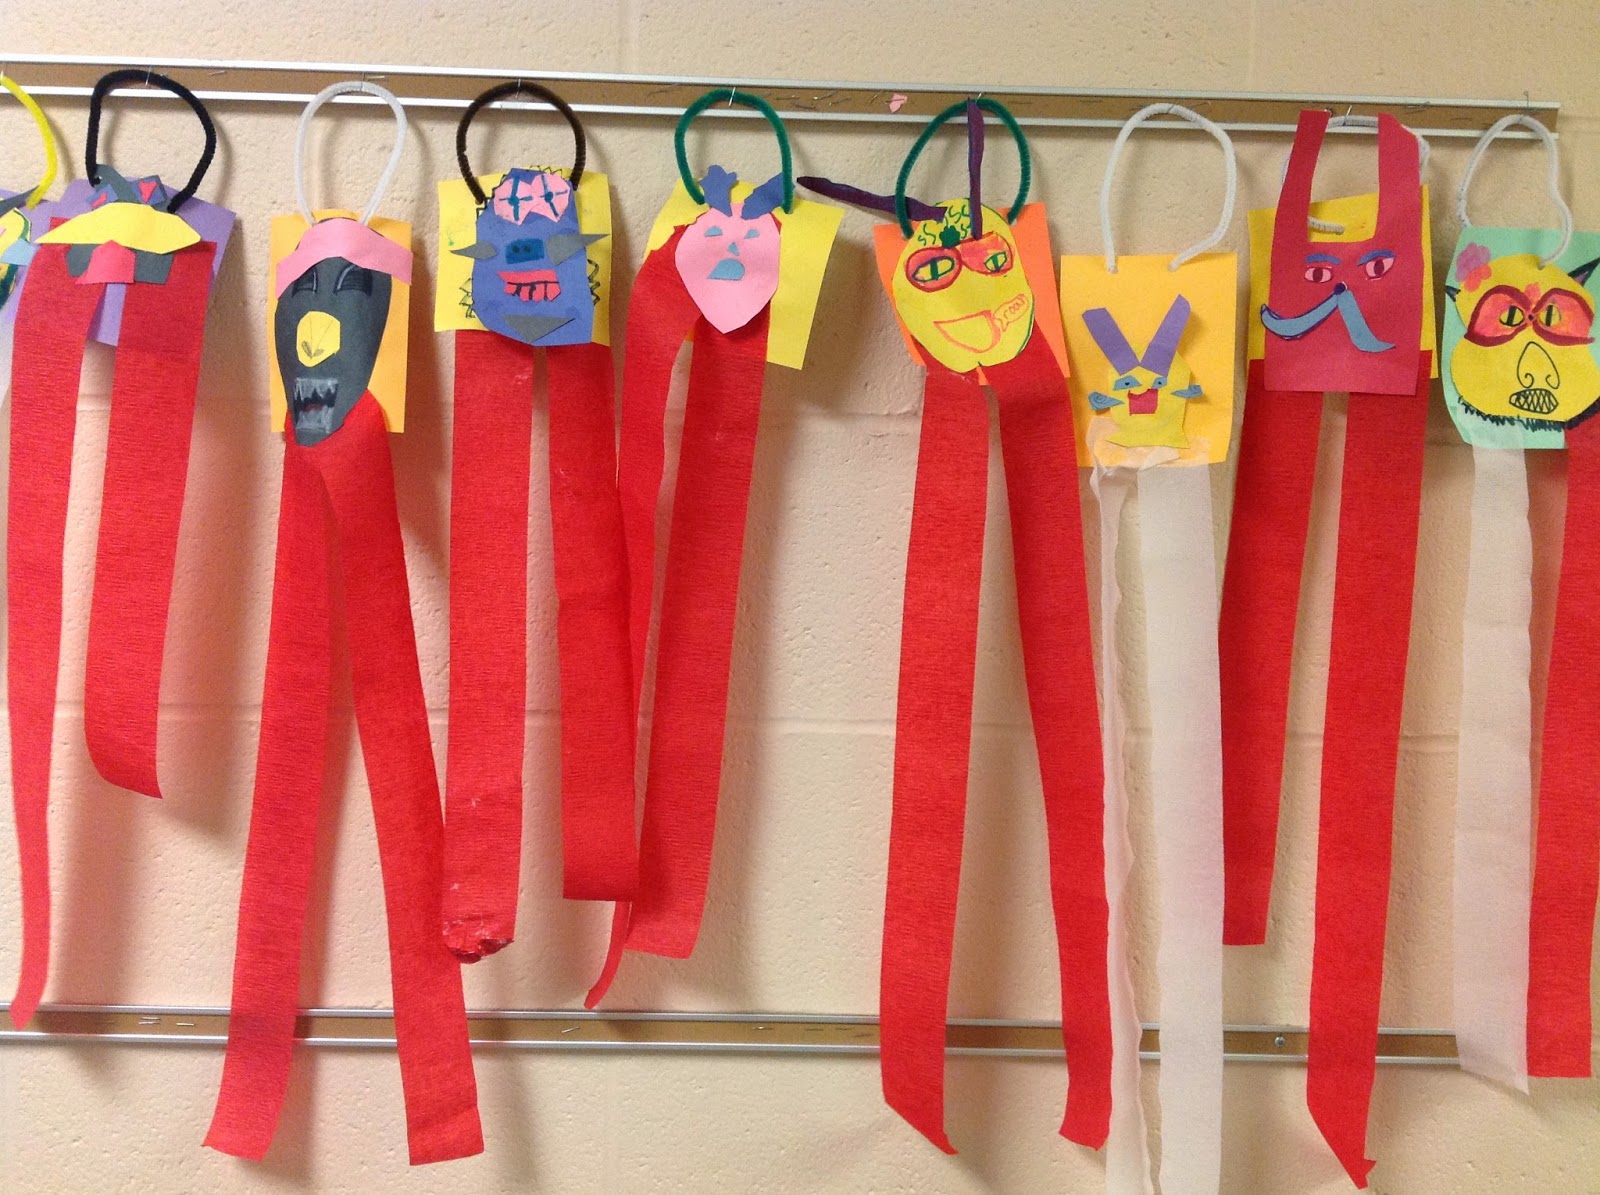
So this is not my lesson, it is the lesson of my colleague and fellow art teacher, Sara Grabau.  She taught her second graders about the Chinese New Year (she taught this back in January, when it was more appropriate...but I am just now bragging about this lesson for her) and they made these amazing collage dragons!  The kids used a variety of coloring materials but the dragons are mostly marker, construction paper, pipe cleaners and crepe paper.  I love their individual personalities!
Second Grade Chinese New Year Dragons Art Lesson

Second Grade Chinese New Year Dragons Art Lesson

Warm/Cool Color Silhouettes


Fourth Grade Warm Cool Colors Silhouette Art Lesson

I introduced (more like revisited than introduced) warm and cool colors to my 4th graders.  We discussed what made a color warm or cool and listed things that we associated with the words "warm" and "cool" and how that helps shape these color schemes.  We also talked about what a silhouette is.  

I showed them a few examples of warm and cool colored backgrounds I had made and asked that they guess what I used and my technique for using it.  The kiddos were spot on!  They could tell that I had used oil pastels and layered the colors and also went over them with either my finger or a tissue to blend the colors.  

I also showed them a finished example with a silhouette on it.  I asked them to describe what my silhouette was and asked them how they could tell (it was an owl perched on a tree branch).  I wanted them to think about this because I wanted them to realize what details were needed in order to identify a silhouette and how our eyes can still use those clues to tell the difference between one subject (in my case the owl) and another (the tree branch) without relying on drawn lines or too much detail.  
Fourth Grade Warm Cool Colors Silhouette Art Lesson

Once they seemed to grasp the concept, I had them start their backgrounds.  I asked them to decide if they wanted a morning or night sky before they started, and this would determine if they worked with warm or cool colors.  They covered an entire sheet of construction paper with their chosen color scheme and blended the pastels (some better than others).

I gave them black construction paper and white colored pencils to draw out their silhouette.  I had to remind them that the pencil side would get glued down and that they didn't need to add any details like eyes, clothing, etc. They cut and glued their silhouette onto their background and we were finished within the hour! 

I love the variety of subject matter they came up with.  I go back and forth on requiring certain subject matter, in some lessons, I think it is important to narrow it down for the students.  But in this case, I think the freedom suited them well.  All of their work is pictured below with a few close ups for details.  Enjoy!

Fourth Grade Warm Cool Colors Silhouette Art Lesson

Fourth Grade Warm Cool Colors Silhouette Art Lesson

Fourth Grade Warm Cool Colors Silhouette Art Lesson
 Fourth Grade Warm Cool Colors Silhouette Art Lesson

Fourth Grade Warm Cool Colors Silhouette Art Lesson


Fourth Grade Warm Cool Colors Silhouette Art Lesson

Fourth Grade Warm Cool Colors Silhouette Art Lesson

Fourth Grade Warm Cool Colors Silhouette Art Lesson

Fourth Grade Warm Cool Colors Silhouette Art Lesson

Fourth Grade Warm Cool Colors Silhouette Art Lesson

Fourth Grade Warm Cool Colors Silhouette Art Lesson

Fourth Grade Warm Cool Colors Silhouette Art Lesson

Fourth Grade Warm Cool Colors Silhouette Art Lesson

Fourth Grade Warm Cool Colors Silhouette Art Lesson

Fourth Grade Warm Cool Colors Silhouette Art Lesson

Wednesday, March 12, 2014

Clay Masks

When It's Okay To Make Faces At Your Teacher

Sixth Grade Clay Mask Art Lesson- Class Photo
6th Grade Clay Masks
My sixth graders created clay masks that were to show some sort of expression.  While some were more expressive than others, they definitely all had some personality!

I introduced this lesson like I do many of my lessons...with a PowerPoint presentation of what we were going to do and why with examples of artwork to what we would make.  The kids were immediately pumped for this one.  After the introduction we started by making sketches of what we wanted our mask to look like.  I reminded them that they should be demonstrating some sort of facial expression but they didn't have to look realistic or even human.  I loved the variety of their ideas, they were all very original.  
Sixth Grade Clay Mask Art Lesson- Class Photo
6th Grade Clay Masks
In the next class period I discussed and demonstrated how we would make slabs of clay and "pillows" of newspaper for them.  I encouraged them to make a clay slab and cut it into the appropriate face shape based on their sketch.  Then they should wad up newspaper into a smaller version of the same face shape (some masking tape could be used to maintain the shape if needed).  They would then drape their clay slab over the newspaper pillow so that the mask would take on more three dimensional qualities. The newspaper pillow was kind of tough for some of the kids, they had a difficult time sizing them appropriately to their slab.  But once this task was done, everything else was a breeze.
Sixth Grade Clay Mask Art Lesson- Class Photo
6th Grade Clay Masks (with a few covered faces for privacy)
In our third class period with this lesson, I reminded the students how to slip and score (or "scratch and attach" as I call it with my younger grades) any attachments they may need in order to give their masks the desired facial features.  We talked about how to avoid trapping air in any hollow forms (I focused on noses as an example) and how to kind of play with the clay to work out air bubbles before modeling any attachments we would make.  We also discussed and I demonstrated the use of clay tools for a subtractive clay method to get details or various facial features.   The kids were encouraged to stick to their sketch as much as possible, though I did allow for some variations based on difficulty and new ideas.  I gave the students one more class period to clean up their masks and finish any attachments or details they may have desired.  After they were done building the mask, I had them create two holes (one in each side of the head) using a kabob stick so that I could run wire through the back of the mask when they were finished.  The wire would let the kids hang their mask up when they took it home.

After the masks dried out (I gave them a little over a week to dry before putting them in the kiln) I fired them and we were able to accentuate their personalities with some color.  We used two more class periods to paint our masks with acrylic paint and another class period to add a gloss/varnish over the top if desired.  During my planning time, I strung wire across the back and through the holes the kids had made while it was wet so they could be hung.  I love how they all turned out and how excited they all were to take them home and show them off!  I just wish I had taken more photos throughout the process (too much clay on my hands) and had remembered to take more pictures at the end to show them off on my blog.  Unfortunately, I thought of it, right before they took them home, so I only snapped a few quick pics...shown below.


Sixth Grade Clay Mask Art Lesson
When asked if her masks was a zombie, she said "No, she's just been eating strawberries.  That's why her teeth are red." Ha!  Love it!

Sixth Grade Clay Mask Art Lesson
A Variety of Masks - Some Opted Not to Add Gloss/Varnish

Sixth Grade Clay Slab Mask Art Lesson
Ever seen a 3-eyed Ccat?  How about one with a mustache...ABOVE the nose?

Sixth Grade Clay Slab Mask Art Lesson
Elephant Mask

Sixth Grade Clay Slab Mask Art Lesson
Goofy Guy...just like his maker
Sixth Grade Clay Slab Mask Art Lesson
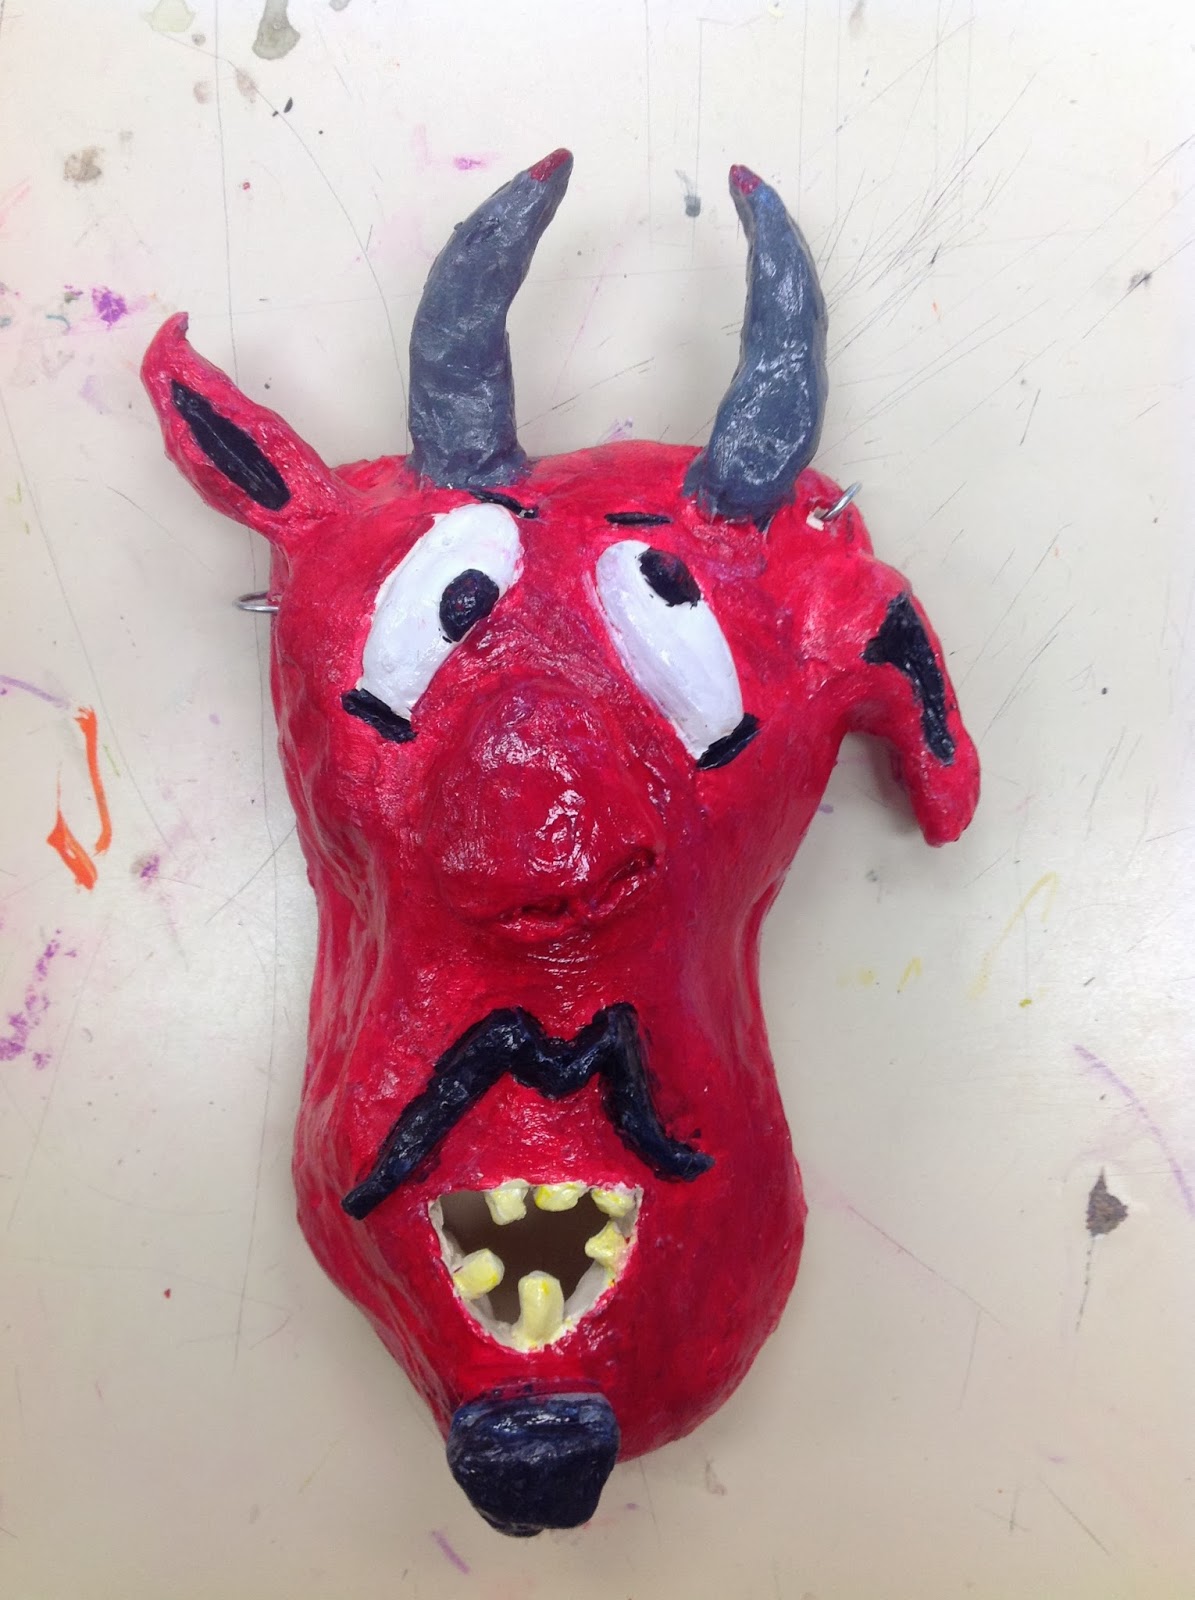
Crazy Devil

Found Object Printmaking

Fourth Grade Found Object Printmaking Showing Space Distance
Showing Distance Using Size, Location and Amount of Detail
Last week, my fourth graders made monoprint flowers-lesson plan found here.  This week, we took printmaking to another level (a messier, crazier, and very fun level).  I introduced them to printmaking with found objects.  I knew that they would want to dive right in and start going crazy with the paint (I used tempera), so I asked that they make me two prints, one was a free choice/experimental print and the other demonstrated an understanding of space.
Before I even told them that we were going to be printmaking again, we discussed space as a class.  We focused on how you can show space/distance using placement, size and color and discussed the exceptions. Then I told them about our prints we would make and how we would make them and did a short demo. That's when they got messy!  And they had a blast the entire time.

Found Object Printmaking
The Objects...Post-Printmaking

I had five trays of objects sitting out (aftermath pictured above).  Each tray was labeled with the two colors that those objects could be used in-black and white paints had their own trays-I did this to avoid all of the paints from mixing into a brown.  We discussed why these objects could only be used in these colors and how a little bit of paint goes a long way (less is more).  Then we got down to business!  The kids used the objects to create one scene that showed distance in some way, shape or form and they also created a free choice print, where they could experiment in anyway they wanted.  Some of them made pictures of things with their free choice and others just played with it.  A few kids struggled with the concept of printing/stamping with the objects instead of painting with them, but most of them got the hang of it pretty quickly or where at least able to correct themselves when I pointed it out.  
Fourth Grade Found Object Printmaking
Free Choice - Bacon (this girl LOVES bacon)

Fourth Grade Found Object Printmaking Showing Space Distance
Flowers Showing Distance

Fourth Grade Found Object Printmaking Showing Space Distance
Another Flower Print Showing Space

Fourth Grade Found Object Printmaking
Free Choice Print- Apple Tree


Fourth Grade Found Object Printmaking
Free Choice-Experimental
Free Choice Flowers

Fourth Grade Found Object Printmaking Showing Space Distance
A House In the Woods