Wednesday, January 8, 2014

The Mummy Games

With Your Host, Mrs. Heath-opatra


My students just finished their Egyptian mummy unit.  We followed similar steps to my lesson posted here and here last year.  And had equally awesome results.  But this year, since we ended our lesson right before winter break, I invented The Mummy Games for a bit of Egyptian inspired fun on our last day before we could sleep in for two weeks.  Unfortunately we had a late start due to poor weather and were already dismissing early, so I only had time with one of my sixth grade classes.  But they had a blast!  They were even reminiscing about it today (we just got back from break).

A run down of the Mummy Games:
  • I let the kids split themselves into 5 teams of 5 (if a team only had 4, it wasn't a big deal, they just had to make sure everyone participated)
  • I gave a brief rundown of how the games would go and what challenges they would face and what to expect (I gave each team a copy of the following and explained it a bit)
Mummy Games Rules/Task Handout-Guide
  • I had a line drawn on the floor with painters tape that each team started behind
  • The first task was to wrap up one team member in toilet paper so that they were mostly covered/wrapped up like a mummy
  • The mummy had to then walk without bending their legs and arms out in front of them (mummy-style) from the tape line down to my whiteboard which had enveloped labeled 1,3 and 4 taped to it
    • Each team had their own set of envelopes
  • The mummy grabbed envelope 1 for their team and raced back (still walking mummy-style) with its contents
  • The team found inside of their envelope instructions which lead them to building an Egyptian/Pharaoh's headdress (template found and printed from this site) which you can see me wearing in the photo at the beginning of this blog entry
  • Another team member had to wear the headdress and run to "The Nile River" and were warned to beware the crocodiles


    • Each team had their own Nile River which was a tub of water (tinted blue with tempera paint) and floating marker caps.  Inside one marker cap was the Pharaoh's treasure aka yellow beads glued inside; the Pharaoh (kid wearing headdress) had to find their treasure and bring it back to their team
      The Nile River
      The Pharaoh's Treasure (yellow beads glued inside of a marker cap)
      Crocodiles (googley eyes and sharpie on marker caps)
  • The mummy had to race back to the whiteboard to grab envelope 3.  Inside they found a message/instruction written in hieroglyphics which they had to decode with a legend, also found inside of the envelope

  • Instructions in hieroglyphics
    I highlighted the letters "E" and "I" since they used the same hieroglyphic.  The students had to use their better judgement when decoding
    • The deciphered message told them to mummify their pet dinosaur (a toy dinosaur and bandages were available and labeled as "3" on a separate table for them to grab and then mummify
  • The mummy raced and grabbed envelope "4" which included another hieroglyphics message
    • When deciphered, they were told to use the materials provided (cups) to build a pyramid around their mummified dinosaur and the Pharaoh's treasure
  • The first team to correctly decipher the messages and complete the tasks won!
All of the supplies (minus the envelopes /contents and Nile Rivers) on one table, and labeled per task given
It was such a great time!  The kids had a blast and were really good sports about the whole thing!  We had a little extra time at the end of the period and it was their idea to play hot potato with the remaining toilet paper and watch all of those who ended up in the middle get mummified by default...it was hysterical and I loved that it was their idea!
The Day of the Dead Skeleton Even Participated!

Thursday, December 19, 2013

Batiks

5th Grade Batiks

5th Grade Gel Glue Batik Art Lesson
I absolutely love batiks and even have one hanging in my classroom that my sister had brought me back from Tanzania.  So when I learned that you could make batik-esque artwork using gel glue instead of hot wax, I couldn't wait (seriously, I made it my very lesson plan) to put it to the test with my fifth graders!

I started by asking students if they knew what batiks were.  None of them did, but they did a great job of using context clues by taking guesses based on the photo I had up as the cover slide in my PowerPoint.  I explained a little bit about them and how, traditionally, they are made and where they are most commonly made in the world.  I then explained how we would be doing our own variation of batiks and they could choose whatever subject matter they wanted (whether they made a scene, a pattern/design or just a fun little picture).

We started by drawing our designs out on paper with pencil.  Once students liked their drawing, they traced it in marker (we used permanent marker which I will not use in the future, just because it isn't necessary.  I will just use washable markers next time).  The purpose of the marker is so that we can lay fabric (we used muslin) over our drawing and still be able to see the drawing.  We then used Gel Glue (from what I read, it must be gel glue, not regular white school glue) to trace the drawing onto the fabric.  Then set them on the drying rack.  I made the mistake of leaving the fabric on the paper and when the glue dried, the paper glued to the back of our fabrics...so lesson learned, be sure to lay the fabric on the drying rack by its lonesome!

5th Grade Gel Glue Batik Art Lesson

5th Grade Gel Glue Batik Art Lesson

Once the glue was dry, each student was able to paint their batik (well, first, we had to peel off the paper that glued itself to the fabric).  We used watered down acrylics and I reminded them to paint the entire piece of fabric (even over the top of the glue) and that later we would wash away the glue, and those lines/designs/drawings would be white.  We discussed how they did not need to "color inside the lines" with the paint, that the colors could mix and spread however they wanted them to.  The students painted their batiks to their liking and once again, they were on the drying rack.

5th Grade Gel Glue Batik Art Lesson

5th Grade Gel Glue Batik Art Lesson

5th Grade Gel Glue Batik Art Lesson

5th Grade Gel Glue Batik Art Lesson

Once the paintings were dry, I placed them in some tubs of warm water to let them soak (this helps with the removal of glue).  I tried washing the glue off directly under the sink at first; it worked but took much longer than the ones I soaked.  Personally, I let them soak overnight and in the morning, I washed each batik under the sink to remove the glue (at this point it was more like slime) and whatever paper crumbles had clung onto the backs of our fabrics.  I placed them on the drying rack (yet again) and let them dry for the last time!  They dry a little crinkled, which doesn't bother me, but I'm sure they could be ironed too.  The paint faded just a bit in the washing process, but all in all, I am in love with the results!  The kids were so excited to see their work in the hallway, almost as excited as I am!  This is a lesson I cannot wait to repeat (in fact, I introduced it to my middle school art club)

5th Grade Gel Glue Batik Art Lesson
Star Design


5th Grade Gel Glue Batik Art Lesson


5th Grade Gel Glue Batik Art Lesson
Pattern and Design

5th Grade Gel Glue Batik Art Lesson
Weeping Willow Tree

5th Grade Gel Glue Batik Art Lesson

5th Grade Gel Glue Batik Art Lesson
Turtle

5th Grade Gel Glue Batik Art Lesson

5th Grade Gel Glue Batik Art Lesson
Line Design


Friday, December 13, 2013

May the Force Be With You

Star Wars Art

While neither of these things in this post are assignments, they were worthy of sharing.  My cousin had posted a link to some Star Wars themed snowflake templates (it is a cached copy for some reason) and I couldn't help but print a few out in case my 6th graders finished their assignment early and were as nerdy as I am.  So I gave them the options of Yoda, Darth Vader, Boba Fett, Chewbacca and a Storm Trooper (Storm Trooper not all pictured below).  They were tricky templates but I was impressed with how well the kids did with them.

Star Wars Snowflakes


One of my fourth graders finished early and also took this as an opportunity to make some Star Wars art from paper.  He made his own origami Star Wars characters!  I couldn't believe how well and how quickly he whipped these things up!  So fun!

Star Wars Origami

Christmas Ornament Drawing

Tis the Season!

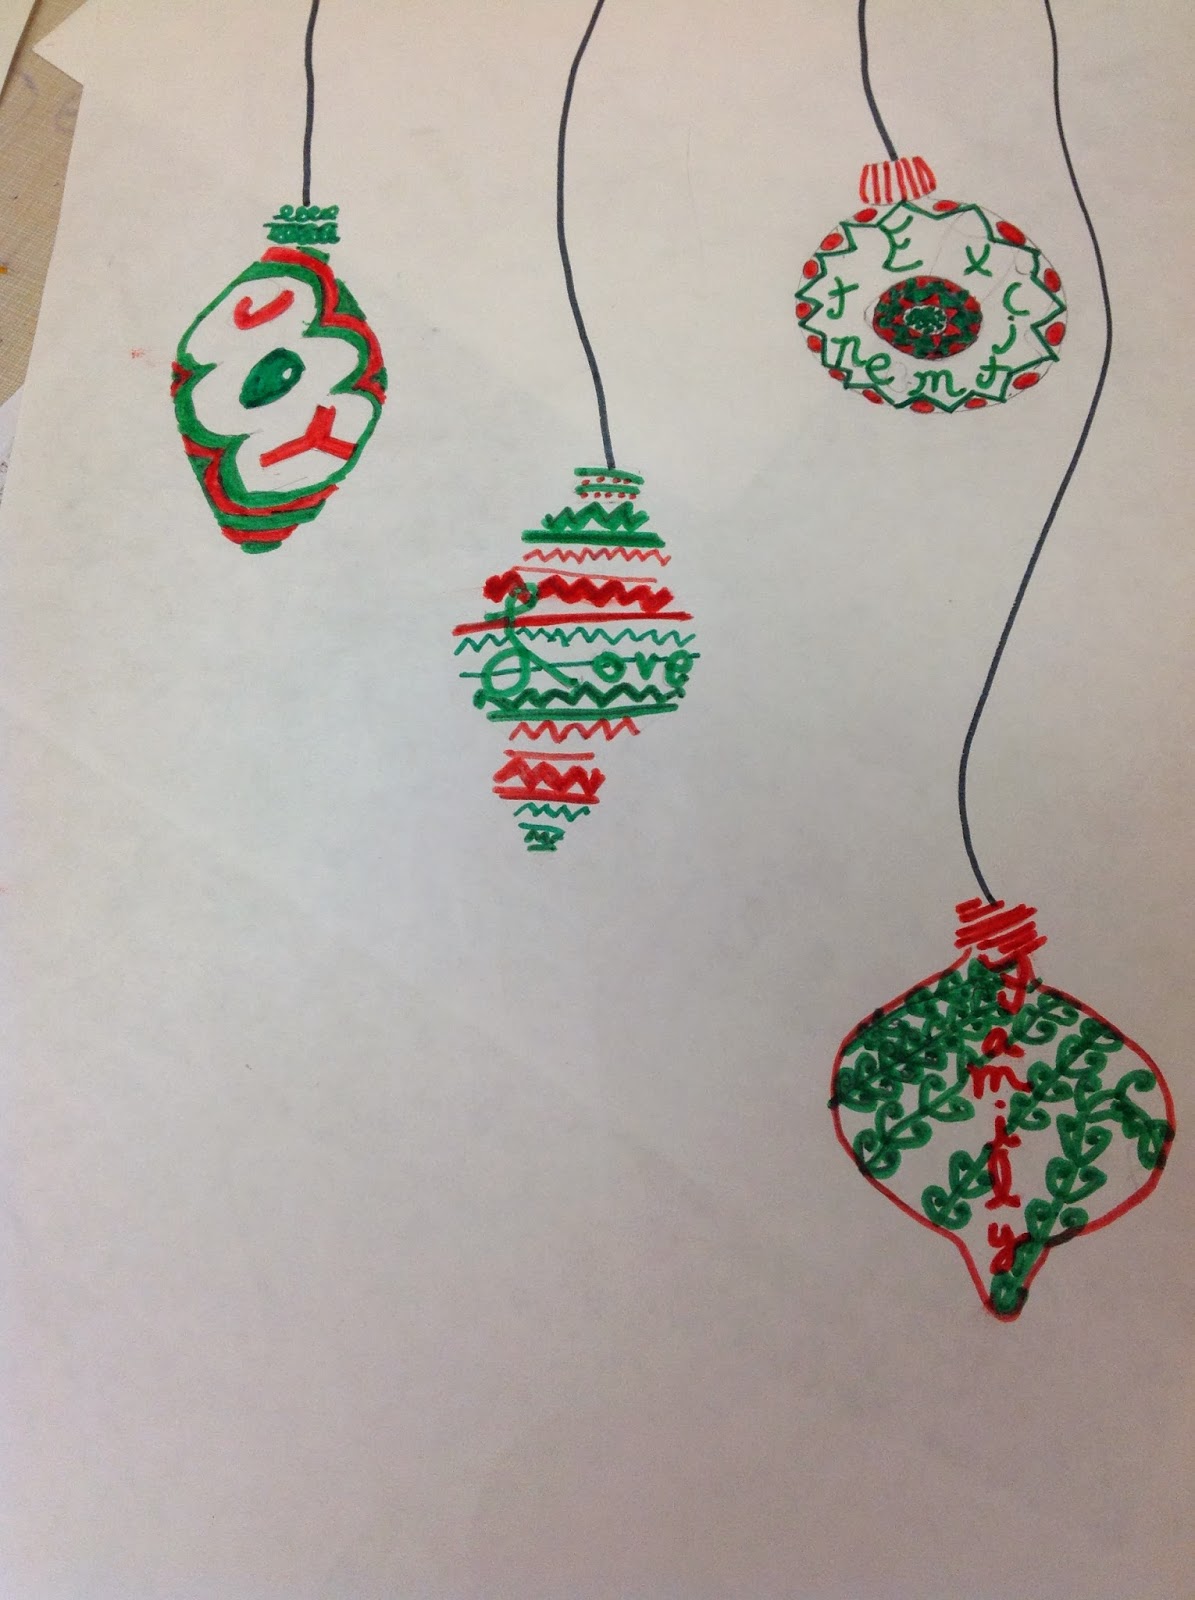
Fourth Grade Christmas Ornament with Meaning and Variety Art Lesson

As an art teacher, it's hard to get away with not doing some holiday themed art projects.  My struggle is to keep them from being too crafty where they all look the same while still keeping the kids excited and wanting to share their holiday artwork with their friends and family.  In my free time while perusing the internet, I came across this art lesson from another blog--Art Projects for Kids--and decided to adapt it just a tiny bit for my fourth graders.
Fourth Grade Christmas Ornament with Meaning and Variety Art Lesson


I started the lesson by having my students make a list on our white board of words that describe the real meaning of Christmas (I discouraged "presents" and "Santa" on this list but that didn't stop from kids saying them).  We ended up with a fantastically lengthy list from each of my 4th grade classes.  I let the kids know that we were going to be keeping those words in mind in our art project but we were also going to incorporate something else; variety.  I introduced them to "variety" and we discussed how you can have variety among lines (through type or thin/thickness) as well as shapes and colors.  This is when I showed them what we were making.  

Fourth Grade Christmas Ornament with Meaning and Variety Art Lesson

I allowed students to trace stencils if they'd like (I created stencils of four shapes of ornaments, trees and crosses) or free hand their images.  I asked that they fit at least three items on their paper and start but drawing/tracing with "whisper lines" so we could erase them later.  We then filled each shape (regardless of what it was) with at least one word that describes the real meaning of Christmas in an interesting font and the rest of the shape should be filled with lines and shapes while demonstrating "variety."   In the end, we erased our "whisper lines" and the goal was that you could still tell what the original shape was without it being outlined or entirely colored in.  A few kids still colored their shapes in or outlined them, but for the most part, I think this gave the kids a chance to remember what this season is about and practice using some basic art elements.  The drawings came out beautifully and the kids were eager to take them home!

Fourth Grade Christmas Ornament with Meaning and Variety Art Lesson

Fourth Grade Christmas Ornament with Meaning and Variety Art Lesson

Fourth Grade Christmas Ornament with Meaning and Variety Art Lesson

Fourth Grade Christmas Ornament with Meaning and Variety Art Lesson

Thursday, December 12, 2013

One Point Perspective

Fourth Grade Art Lesson One Point Perspective
I introduced fourth grade to the concept of one point perspective.  I started by letting them take some guesses as to what it meant and they were pretty close with their guesses.  Most of them based their definitions off of the word "perspective" and their knowledge that it had to do with how you see something.

Once we had the definition down, we put our knowledge to work.  This lesson was also a good opportunity for me to show students how to hold and use a ruler as a straight edge.  I think it is an important skill to have, especially in art, and without this demonstration, a lot of them get tangled up in their own arms!  I had them make an eight sided shape somewhere on the top half of their paper and draw a small dot (or "point") anywhere on the bottom half of their paper.  We discussed how to match up the corners from the shape down to the point and how to know which ones to draw and which ones would be behind the three-dimensional version of the shape if it were real.

Fourth Grade Art Lesson One Point Perspective

 We also took this as an opportunity to play with lines and shapes within patterns and designs.  In each section created from matching corners to the point, they were to draw a different design or pattern.

Fourth Grade Art Lesson One Point Perspective

The kids did a great job and were eager to show off their one point perspective skills during their finished early time too!  Many of them played around with drawing more shapes and even letters in one point perspective!  It's fun to see them take a lesson and run with it by exploring other options.  I wish I had taken some pictures of their free time perspective drawings, they were pretty impressive!


Fall of 2014 Variation and Examples:

I taught the same great lesson to my 4th graders this year but I switched it up a little.  This time, I offered them a challenge.  If they did not want to do the 8-sided shape, they could do their name (or a word) in block letters...in One Point Perspective!  A lot of the kids were excited about that option and accepted the challenge.  Here are some of my (well, actually my students') results:
Fourth Grade Art Lesson One Point Perspective

Fourth Grade Art Lesson One Point Perspective

Fourth Grade Art Lesson One Point Perspective

Fourth Grade Art Lesson One Point Perspective

Fourth Grade Art Lesson One Point Perspective

Fourth Grade Art Lesson One Point Perspective

Fourth Grade Art Lesson One Point Perspective

Fourth Grade Art Lesson One Point Perspective

Fourth Grade Art Lesson One Point Perspective

Fourth Grade Art Lesson One Point Perspective

Some students finished their One Point Perspective early, I gave them an easy way to draw in Two Point Perspective:

Fourth Grade Art Lesson Two Point Perspective Finished Early

Fourth Grade Art Lesson Two Point Perspective Finished Early