I've fallen really far behind on my blog (mostly because I use a lot of the same lessons and it is easier to justify not updating photos of new work) but I recently realized that I never show off what we are doing in Art Club. I work at a K-8 building but I only open Art Club up to my middle school kids (6th-8th grades). We meet every other week and the way I have it set up, I will always propose a lesson/project but they are not required to participate. Should they choose to opt out of my lesson, they need to come up with their own art project. As long as I have the materials, I let them do whatever project they have come up with. But most of the time, they participate in my lessons. I keep instruction a little more minimal because I want them to have more freedom in their making and ideas, some of them really take off with this and others request more guidance and structure. Enough about how I run the club, let me show off what they've been up to--brief descriptions of the process below each set of photos!

Foil Sculpture: Creating a small sculpture from foil; examples above are: a squirrel with acorn, eagle/hawkman, Pikachu, and a dancing woman. This was actually more of a challenge to the kids than I had anticipated. Getting them to figure out how to manipulate the foil was a good problem solving task for them!
Marbled Tiles: permanent marker drawn onto ceramic tiles, use eye droppers of Isopropyl Alcohol (thank you science room for beakers and eye droppers!) to put a few droplets of alcohol onto the drawing and watch the magic happen! They change so much as they dry, it is amazing!
 |
| Tape Construction |
 |
| Tape Party in the Kiln Room |
 |
| Throwing snowballs |
 |
| Spiderman Tapeman |
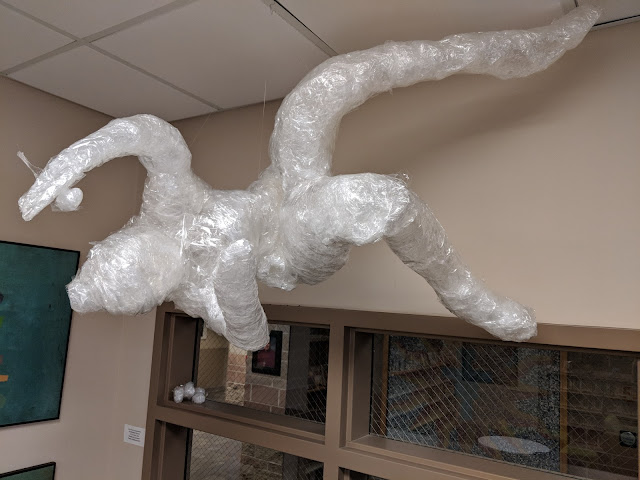
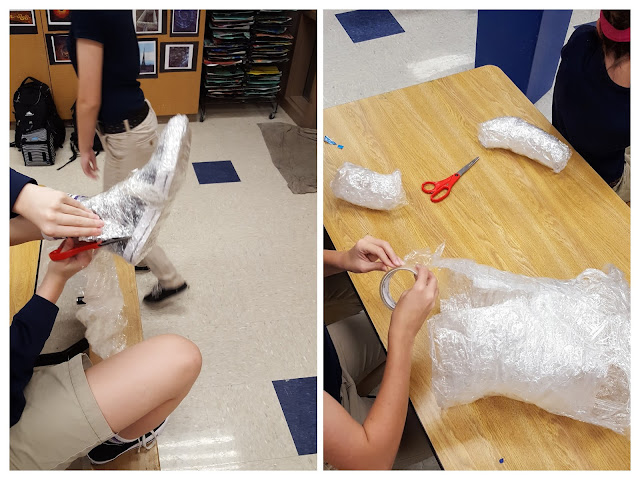
Tape Sculptures: Art Club members created their own groups and worked together to form their sculptures piece by piece. They started with saran wrap-one layer per body part- then wrapped the same area in multiple layers or clear packing tape. They carefully cut themselves out of each piece and retaped the body part back together where it was cut. Once all body parts were created, the entire sculpture was taped together and formed. We then hung them in the library of our school to show them off. (The party in the kiln was a bonus for the sculptures, they didn't actually stay there for long)
Last Art Club of the Year Activities:
Art Rug, Bubble Paint, & Tie-Dye!
 |
| I cut up a bunch of tshirts and bought some Latch Hook fabric/mesh. I asked the students to write me a message or draw me a picture on a t-shirt strip then tie it onto the mesh so that I can have a rug filled with love and art! |
 |
| Bubble paint!!! This activity kept popping up in my Facebook newsfeed and I'm so glad it did. I loved it and so did my kids! I had them make their own bubble blower with a waterbottle (cut in half), some vegetable mesh/bag, and some tape. The bubbles are a soap, glycerin combo with liquid watercolors added in. So fun! Too bad it was raining outside, we would have made a bigger mess had it been possible! |
 |
| Bubble Paint! |
 |
| Bubble Paint! |
 |
| Tie-Dye! I love ending the year with tie-dye...it's always an Art Club favorite! Pretty self explanatory. Again, I wish it wasn't raining because this is best done outside (for easier clean up) |


No comments:
Post a Comment
Note: Only a member of this blog may post a comment.