Friday, April 25, 2014

Surrealism Collage

Fifth Grade Surrealism Collage Art Lesson
My Surrealism Collage Example
I love collages!  And most of all, I love hilarious collages!  So when I saw a post by one of the bloggers (Artolazzi) that I follow here about surrealism and collage, I was smitten.  What a fun lesson!  I pretty much followed the same lesson as Jenny Bartolazzi but in my own words and with examples of various artists.  The kids LOVED it!

After we discussed Surrealism and looked at some artwork, I showed them how the process would work.  I had previously cut out the pieces I planned on working with and it made the demonstration go smoothly and quickly.  I started with my chosen background (they could choose from 12 options, all cut from expired calenders--my mother in law donated a bunch of calenders from the bank she works for--thanks, Sue!).  I explained how I started just looking through magazines until I found something that gave me an idea or I thought was funny and/or interesting.  The first thing I came along was the superhero, so I cut him out and trimmed away all of his extra background.  When I stumbled upon a boy on his bicycle, I thought that he had the perfect facial expression for someone who needed saving, so I cut him out too.  But when I found the word bubble with "Help!  It's got my Graham-ma!" I changed my plan (I wanted them to keep in mind that plans can change and evolve as they search the magazines).  And then I searched for my villain which was assembled by a man's face and torso mixed with a basketball player's legs and I tucked "grandma" under his arm.  Grandma was found in a sports magazine and is actually a man dressed up as an elderly woman while wearing a pig nose (not sure why there's a pig nose, but I liked it).  I encouraged them to make a surreal scene and to have fun with it and be open to changing ideas as they come upon various images.  While some of them struggled with unifying their images or creating an overall scene, others were able to dive right in with ease.  And regardless if they made a unified scene or not, they had a blast and that experience and excited attitude are enough for me to consider the lesson a huge success!  Now, FINALLY, I will share some of their work with you!

Fifth Grade Surrealism Collage Art Lesson

Fifth Grade Surrealism Collage Art Lesson

Fifth Grade Surrealism Collage Art Lesson

Fifth Grade Surrealism Collage Art Lesson

Fifth Grade Surrealism Collage Art Lesson

Fifth Grade Surrealism Collage Art Lesson

Fifth Grade Surrealism Collage Art Lesson

Fifth Grade Surrealism Collage Art Lesson

Fifth Grade Surrealism Collage Art Lesson

Fifth Grade Surrealism Collage Art Lesson

Fifth Grade Surrealism Collage Art Lesson

Friday, April 18, 2014

Portrait Drawing and Collaborative Art

8th Grade Portrait Drawing Art Lesson

I'm going to start this blog entry by sharing our portraiture lesson and then explain how this become a collaborative piece. So if you start reading and are wondering how this involves any sort of collaboration, stick with me...I promise, I'll get there!

My 8th graders have been taught how to draw faces before, but it never hurts to revisit a lesson (especially on drawing realistically).  Similarly to how I taught my fifth graders portraiture and proportion, I started by handing my classroom over to Oli on YouTube and letting her show off her skills as a 9 year old, while also teaching my 8th graders the basics.

We sketched out our faces and left them alone for awhile to talk about shading.  Shading faces can be tricky and I didn't want them to just add a little grey and smear it across their faces so that they still looked flat but now they were grey.  So we talked about how shadows and highlights add depth and show us the shape of the object and tell us about its form.
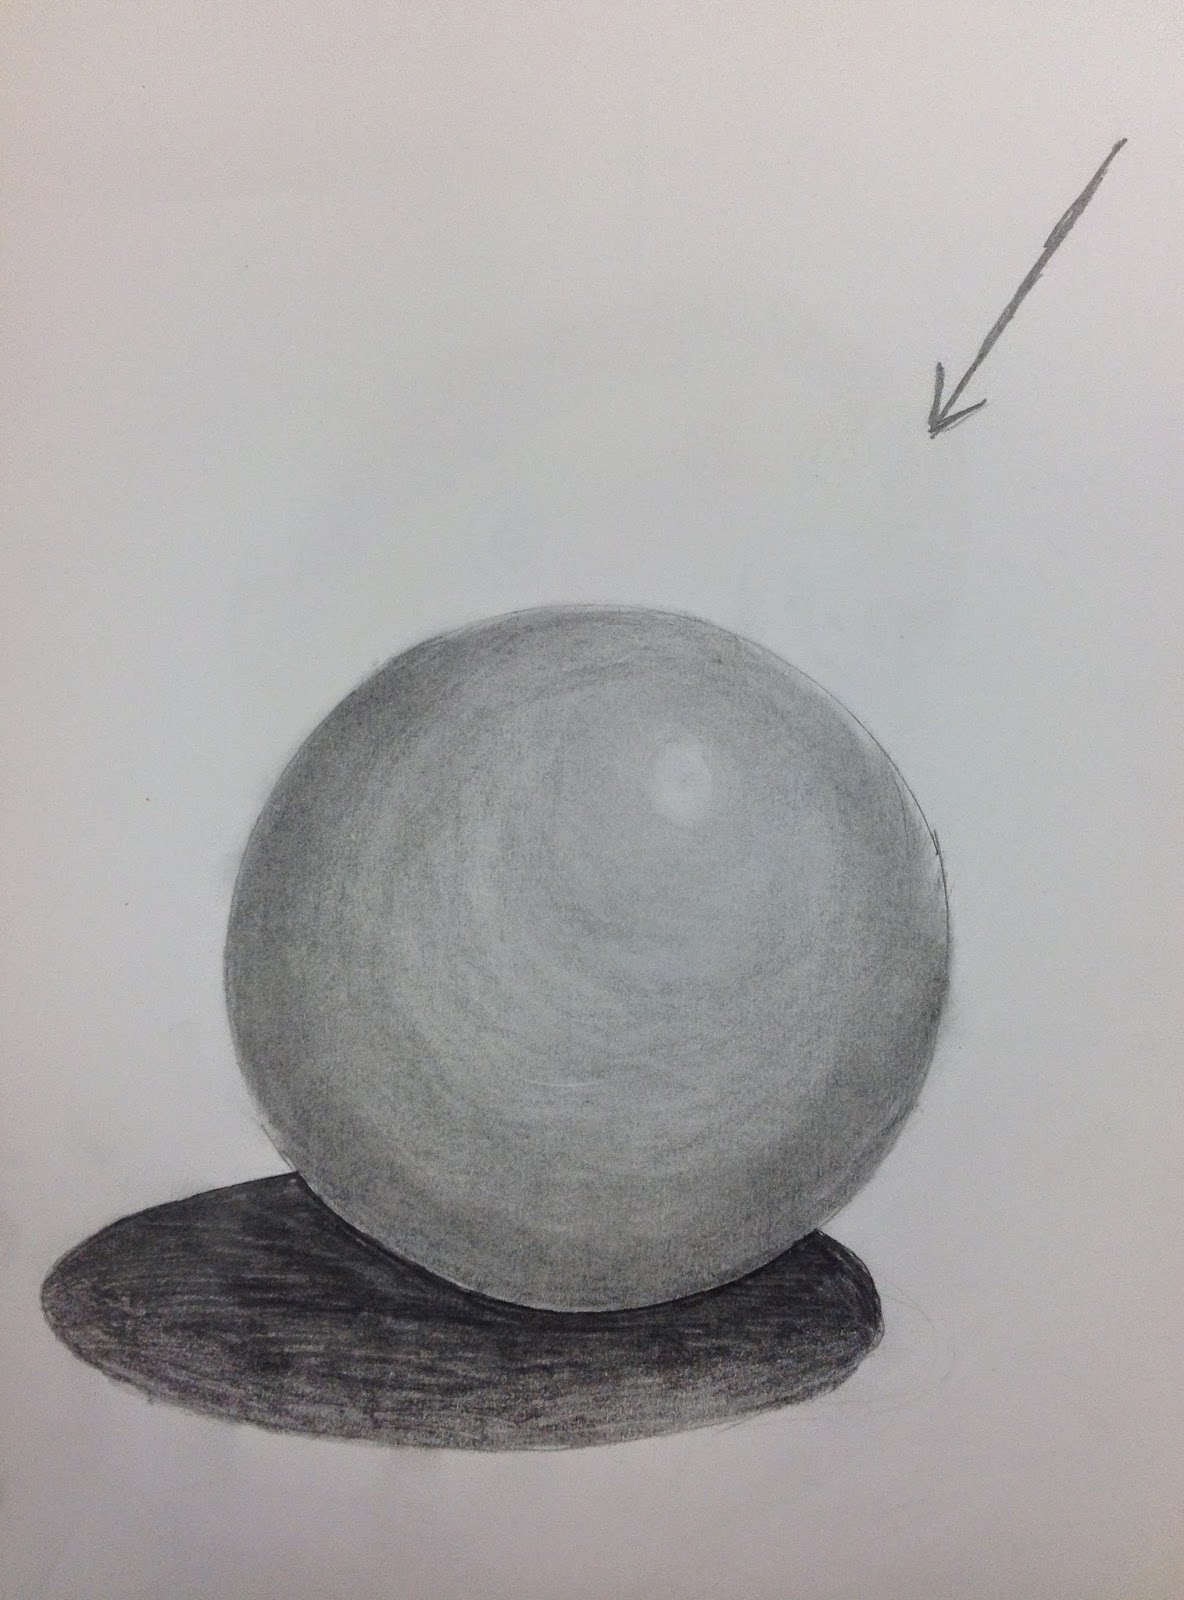
8th Grade Sphere Drawing With Shading and Blending
8th Grade Sphere and Shadow Study
We started out by drawing spheres.  I set out a ball and we noted where shadows were and reflections. Then I put it away and we had to think about it a little bit more.  Where is our light source (pick one)? Where is going to be the lightest spot on our sphere?  How about the darkest?  Etc.  I showed them how to use their pencil in the direction of the curves to accentuate the item's shape and then taught them blending with their finger or a tissue.

Once our spheres were complete, we discussed how that same concept can be applied to anything three-dimensional.  We talked about the high points on our face (cheekbone, forehead, nose and chin) and how/why highlights would fall there.  We talked about the areas with the most shadows and why as well as where middle grey/medium shadows would be.  We also discussed hair and how it is actually individual strands growing from the scalp and not perfectly smooth and colored in solidly.  I reminded them of using their pencil in the direction of the curve on that part of the face and encouraged them to use the sides of their pencils for ease of blending.  We don't have a class set of blending stumps nor shading pencils, so each student was working with their standard #2 and armed with a Kleenex and/or their fingertips.
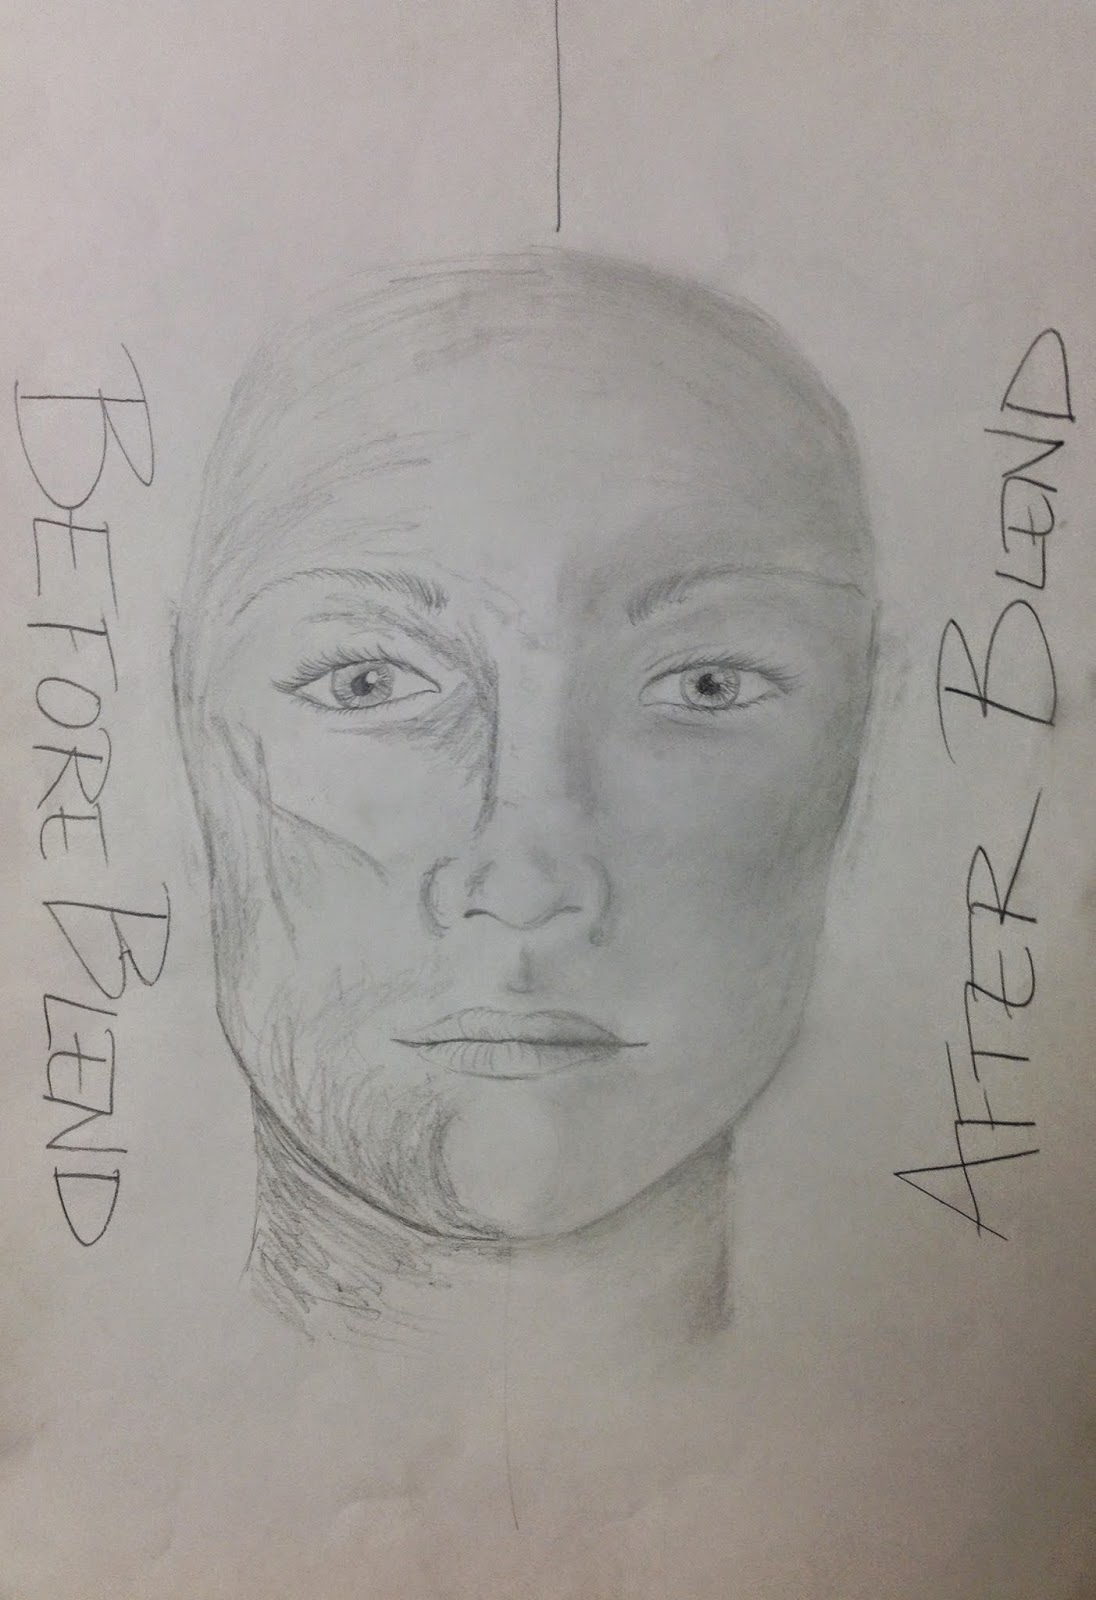
My demonstration example of how shading a face can look before and after blending


8th Grade Portrait Drawing Art Lesson

8th Grade Portrait Drawing Art Lesson8th Grade Portrait Drawing Art Lesson 


8th Grade Portrait Drawing Art Lesson

Once we had covered portraiture...we got into the collaboration!  I work at a K-8 building, and our 8th graders are each assigned a Kindergarten buddy.  The idea is for the 8th graders to show the kindergarten kiddos the ropes and make the little guys feel comfortable in the building and they end up forming these adorable bonds!  This collaboration project was inspired by one of those popular articles that floats around Facebook.  In this blog entry by the artist/blog Busy Mockinbird, an artist and mother discusses and shares images that are created out of collaboration with her four year old.  To cut to the chase, the results are absolutely amazing!  And I wanted my 8th graders to do something similar with their buddies.  

So after we learned about portraiture, I shared my idea and the article with my 8th grade and had each student draw a medium sized head on a blank page in their sketchbook.  The next time that Kindergarten came to art, they were taught about collaborative art and how they were going to be working with their 8th grade buddy (I don't teach the kindergartners Art, but I stopped in and found them cheering at the idea of working in their 8th grade buddy's sketchbook).  And thus, our collaboration portion of the lesson...
Collaborative Art with 8th Grade Portrait and Kindergarten Body Art Lesson

Collaborative Art with 8th Grade Portrait and Kindergarten Body Art Lesson


Collaborative Art with 8th Grade Portrait and Kindergarten Body Art Lesson


But wait, there's more!  After the kindergartners added bodies to our 8th grade faces, they drew a face on another blank page in their buddy's sketchbook.  On which, of course, I had my 8th graders add bodies and backgrounds!

Collaborative Art with Kindergarten Portrait and 8th Grade Body Art LessonCollaborative Art with Kindergarten Portrait and 8th Grade Body Art Lesson

Collaborative Art with Kindergarten Portrait and 8th Grade Body Art Lesson


Collaborative Art with Kindergarten Portrait and 8th Grade Body Art Lesson


Complimentary Color Printmaking

Complimentary Color Printmaking Animal Art Lesson

I wanted my 5th graders to experience printmaking and I found an excellent lesson to be inspired by, here on another blog: Thomas Elementary Art.  While I must admit, he had greater success with his 4th graders on this lesson, I was still pretty pleased with our results, plus I gave them some free/experimental printmaking time at the end.

After I introduced my kiddos with the concept of printmaking, complimentary colors and I showed them some examples we started with our animal sketches on paper.  I provided them with plenty of books for them to use as guides when drawing their animals and encouraged them to draw largely and focus just on the head.  We sketched our animals and with a dull pencil (sharp ones will rip through the paper) traced them on top of a sheet of foam (same size as paper we sketched on).  Once they were traced, we removed the paper and pressed harder into the foam so that our animal stood out.  Now it looks like a stamp!


We used the back of our stamps to get solid color printed onto our paper for background colors.  I was running low on printing ink, so we printed with acrylic paint but we still used brayers/rollers.  I pointed out that we would need to press evenly on the foam to maximize how much paint transferred from the "stamp" to the paper and I reminded them that one of our prints would be done in complimentary colors and the other was a free choice.  The acrylic paint dries so quickly and we were transferring most of the paint onto our background papers, so there wasn't an issue with using two different background colors on our foam.
Cut Foam Printing Option (after use--obviously)
The next class period, I gave my students options.  They could cut out their animal from the foam and use the brayers, use a paintbrush to add color to their animal and/or background of the stamp or roll the brayer across their entire stamp for various printmaking effects.  I reminded them again that one of their prints had to be completed in complimentary colors and the other was free choice and I set them to work!

If they finished early, I allowed them a smaller piece of foam to make a free choice print, or they could continue printing with their animal stamp onto colored paper.  It was fun to see them take what they had learned about the stamps-- the ones who struggled were even making comments like, "this time I am going to press harder" or "I'm going to draw this bigger so that you can see all of the details."  I love hearing them talk about what they learned, especially when I know they struggled or were unhappy with their results.  It shows that they aren't hung up on the product, but the process of getting there!

Photos of the finished work (with some close ups):

Complimentary Color Printmaking Art Lesson
Turtle!


Complimentary Color Printmaking Art Lesson
Duck

Complimentary Color Printmaking Art Lesson
Lion

Complimentary Color Printmaking Art Lesson
Woodpecker (print pictured with foam piece)


Complimentary Color Printmaking Art Lesson
Hummingbird


Complimentary Color Printmaking Art Lesson
Dove


Complimentary Color Printmaking Art Lesson
Owl (print pictured with foam piece)


Complimentary Color Printmaking Art Lesson
Hummingbird--this student experimented a lot with her print and I LOVE how her foam ended up; her foam stamp is the bottom piece!

Complimentary Color Printmaking Art Lesson
Elephant, Cat and Badger (prints pictured with foam pieces)

Complimentary Color Printmaking Art Lesson
Cat


Complimentary Color Printmaking Art Lesson
Monkey

Complimentary Color Printmaking Art Lesson
Elephant

Complimentary Color Printmaking Art Lesson
Dove, Baby Monkey Drinking a Bottle, Turtle and Mouse (print pictured with foam piece)

Close up of the baby monkey drinking a bottle

Complimentary Color Printmaking Art Lesson
Fish with Bubbles

Complimentary Color Printmaking Art Lesson
Lizard Print with Cut Stamp

Complimentary Color Printmaking Art Lesson
Butterfly

Complimentary Color Printmaking Art Lesson
Deer (print pictured with foam piece)

FREE CHOICE PRINTS!
Free Choice Foam Printmaking Art
Prints and Foam Stamp

Free Choice Foam Printmaking Art
The prints of this one didn't come out very well, but the foam stamp is beautiful on its own!

Free Choice Foam Printmaking Art
Turtles, Easter Bunny and Palm Tree prints

Free Choice Foam Printmaking Art
This guy makes me giggle

Free Choice Foam Printmaking Art
This student cut up her free choice foam and made a series of stamps to create an outdoor scene

Free Choice Foam Printmaking Art
Domo

Free Choice Foam Printmaking Art
Fun with Line and Pattern!